Overview
The Linear integration connects your Thena platform with Linear, enabling seamless collaboration between customer support and development teams. This integration provides the following capabilities:- Ticket linking: Connect Thena tickets with Linear issues for complete traceability
- Issue creation: Create new Linear issues directly from Thena tickets
- Issue search: Find and link existing Linear issues without leaving Thena
- Synchronized updates: Keep your project management and customer support systems in sync
Key features
Link Linear issues
- Connect Thena tickets to Linear issues
- View linked issues in ticket details
- Unlink issues when needed
Search Linear issues
- Find existing Linear issues
- Search by title or ID
- Link issues directly from search results
Create Linear issues
- Create new Linear issues from Thena
- Select team, template, and issue details
- Set status, priority, assignee, and labels
Issue tracking
- View basic issue details in card view (ID, status, priority, assignee)
- Access comprehensive details when clicking on issues
- Updates reflected in near real-time
Setup
The Linear integration uses the API key of the user who authenticated it. New Linear issues will be created as this user. If re-authenticated by a different user, subsequent issues will reflect the new user. We recommend using a dedicated Linear account for the integration.
Begin installation
- Navigate to the Apps studio in your Thena dashboard
- Find the Linear integration in the available apps
- Click the “Install” button to begin the installation process
Review and configure
- Review the permissions and scopes required by the integration
- Select the teams in Thena where you want to install Linear
Complete authorization
- After configuration, click “Complete Linear authorization”
- You’ll be redirected to Linear to authorize the connection
- Grant the necessary permissions for the integration
- You’ll be redirected back to Thena once authorization is complete
How to link a Linear issue
From ticket details
From ticket details
- Open a ticket in Thena
- Navigate to the Linear section in the ticket details panel
- Click the “Search issue” button
- Enter the Linear issue key or search by keywords
- Select the appropriate issue from the search results
- Click “Link” to connect the Thena ticket with the Linear issue
Using internal threads
Using internal threads
- Open a ticket in Thena
- Add a comment in any internal thread
- Include a Linear issue link or key (e.g., PRJ-123 or https://linear.app/your-org/issue/PRJ-123)
- The system will automatically detect and link the Linear issue to your ticket
- You’ll see the issue summary, status, priority, and assignee
- Click on the issue to open it directly in Linear
How to search for a Linear issue
Access search
- Open a ticket in Thena
- Navigate to the Linear section in the ticket details
- Click the “Search issue” button
Enter search criteria
- Type your search query in the search field
- You can search by issue key (e.g., PRJ-123) for exact matches
- Or search by keywords to find relevant issues
- You can also filter by project using the dropdown menu
How to create a Linear issue
Initiate creation
- Open a ticket in Thena
- Navigate to the Linear section in the ticket details
- Click the “Create issue” button
Select team and template
- At the top of the issue creation window, choose the Linear team where you want to create the issue
- This indicates the Linear project to which the new issue will be added
- Use the dropdown to change the project to a different one within your Linear workspace
- If your Linear workspace has templates set up, you can select one to pre-fill specific fields
- Click “Next” to proceed
Fill in issue details
- Issue title: Enter a title that summarizes the problem or task
- Description: Provide detailed information such as steps to reproduce or expected outcomes
- Status: Select from statuses fetched from the relevant Linear team’s configuration
- Priority: Assign a priority level (Urgent, High, Medium, Low, No priority)
- Assignee: Designate a team member responsible for this issue (list shows assignees from Linear)
- Labels: Add relevant labels to categorize and filter issues within your project
- Project: Confirm the correct project assignment (pre-selected based on team choice)
- Cycle: Confirm the correct cycle assignment (pre-selected based on team choice)
- Click “Create” to finalize the issue
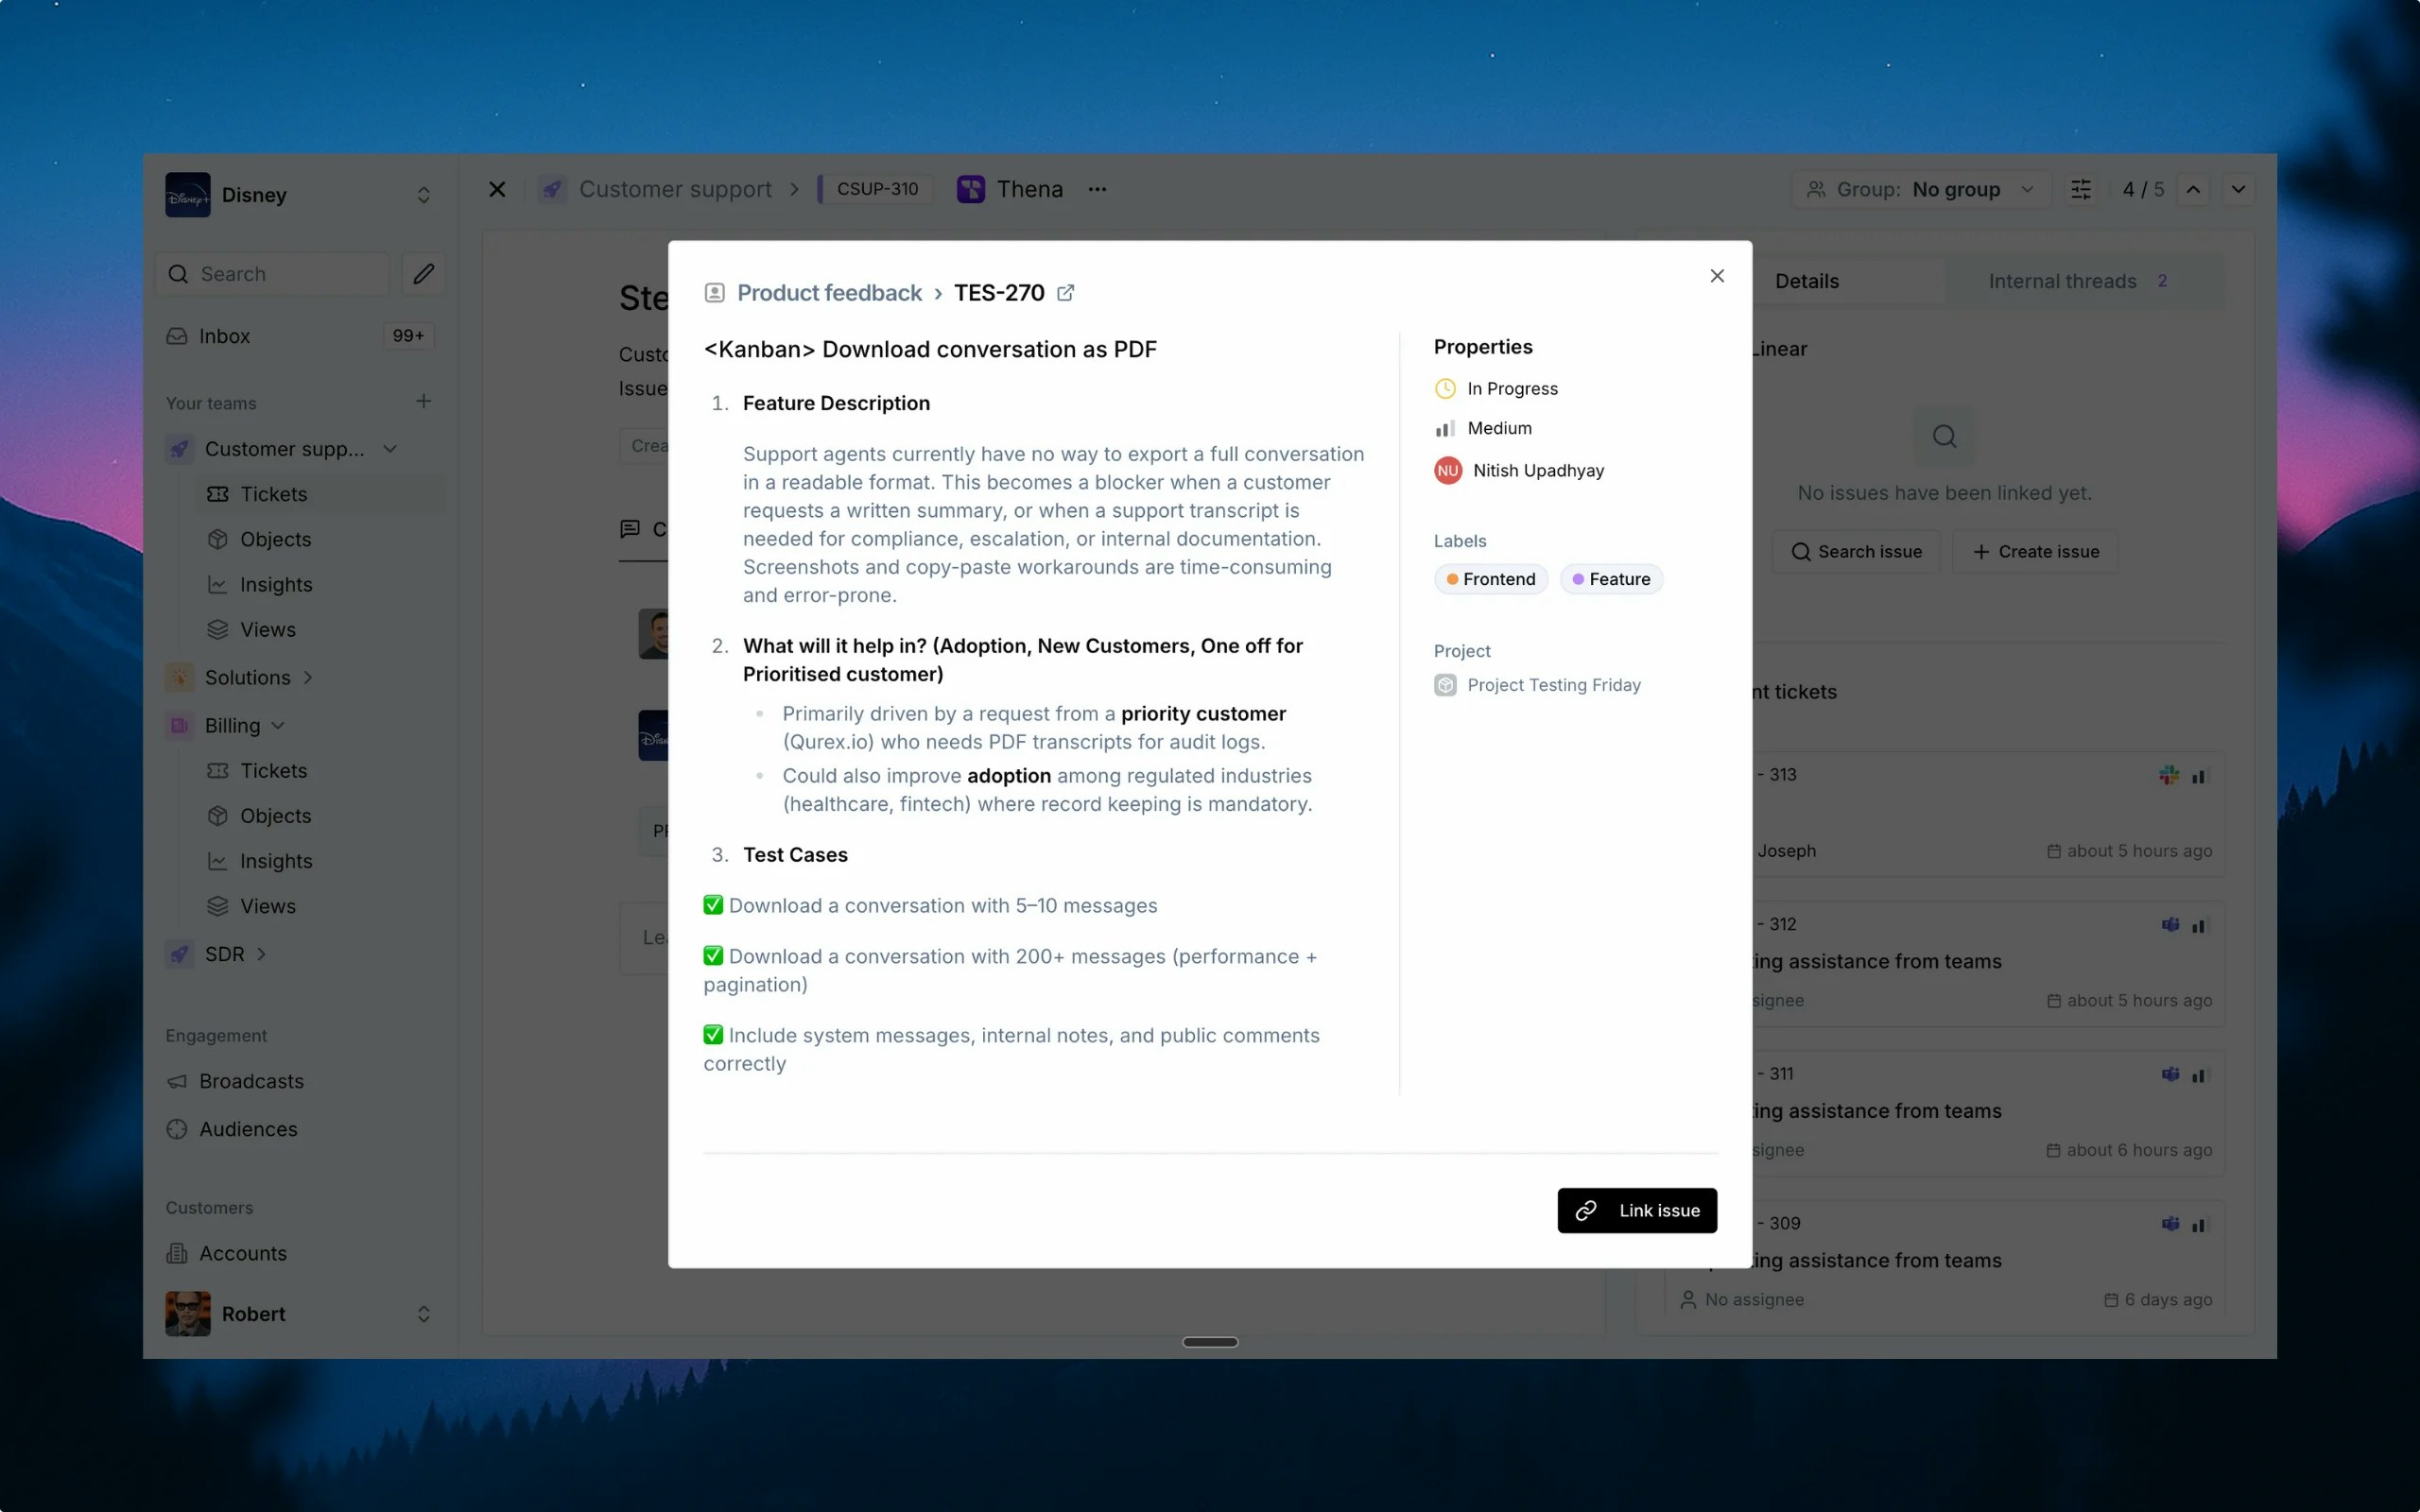
Viewing Linear issue details
Access linked issue details
- Open a ticket with a linked Linear issue in Thena
- Navigate to the Linear section in the ticket details panel
Understanding issue information
The Linear issue details include:
- Status: Current workflow status of the issue
- Priority: Issue priority level (Urgent, High, Medium, Low, No priority)
- Assignee: Team member responsible for the issue
Permission scopes
The Linear app requires specific permissions to function properly. When authorizing the app, you’ll be asked to grant the following permission scopes:Thena platform permissions
Thena platform permissions
ticket:read
Access to read ticket information from Thena:
- Read ticket data for synchronization with Linear
- Access ticket details for linking with Linear issues
- View ticket metadata for proper integration
Linear API capabilities
Linear API capabilities
Team management
Access to Linear teams:
- Get teams and team information
- Set default teams for issue creation
- Access team-specific configurations
Issue operations
Full issue management capabilities:
- Create new issues with detailed metadata
- Search existing issues
- Link and unlink issues with Thena tickets
- View issue details including status, priority, and assignee
File operations
File handling capabilities:
- Upload files to Linear
- Attach files to issues
FAQs
Can I link multiple Linear issues to a single Thena ticket?
Can I link multiple Linear issues to a single Thena ticket?
Yes, you can link multiple Linear issues to a single Thena ticket. Each linked issue will appear in the Linear section of the ticket details panel, allowing you to track multiple related issues.
What happens if a linked Linear issue is updated?
What happens if a linked Linear issue is updated?
When a linked Linear issue is updated, the changes will be reflected in the Thena ticket details. This includes updates to status, priority, assignee, labels, and other issue details. The synchronization happens near real-time, ensuring you always have the latest information.
What information is displayed for Linear issues in Thena?
What information is displayed for Linear issues in Thena?
In the card view, the integration displays basic Linear issue information:
- ID and title
- Status
- Priority
- Assignee
- Title and description
- Status with all available options from the Linear team’s configuration
- Priority levels
- Assignee options
- Labels
- Project assignment
- Cycle assignment
What permissions do I need in Linear for this integration?
What permissions do I need in Linear for this integration?
You need:
- View permissions for the teams you want to access
- Create issue permissions if you want to create new issues
- Edit permissions if you want to update existing issues
Can I unlink a Linear issue from a Thena ticket?
Can I unlink a Linear issue from a Thena ticket?
Yes, you can unlink a Linear issue from a Thena ticket by clicking the unlink button next to the linked issue in the ticket details panel. This will remove the reference in Thena.
Is there a limit to how many Linear issues I can link or create?
Is there a limit to how many Linear issues I can link or create?
There is no specific limit imposed by the Thena integration on the number of Linear issues you can link or create. However, be mindful of any API rate limits that may be enforced by Linear.